dexterbox documentation
Updated: 15/08/2016
Version: 1.0.0
By: MASSCODE
URL: http://codecanyon.net/user/yurik417/portfolio
Email: limasscode@gmail.com
Introducing
Description
Dexterbox is responsive, flexible, modern, creative, and at the same time very easy to use lightbox plugin.
He's doing a demonstration of your content is very spectacular.
You can use plugin Dexterbox to showcase your screens of mobile applications cases, pictures, video from youtube and others.
Dexterbox can be used to create stunning overlays that work great at any screen size, in all browsers on every device.
The uniqueness of plugin in that it have an inside generator of color themes.
Features
- Truly responsive lightbox
- Javascript API (the ability to add all images and lightbox exclusively by JS).
- Combining images into groups.
- A large number of callback functions allow to unite this plugin with other user functions.
- An alternative method of calling the plugin using the HTML code (without JS initialization).
- The ability to pass parameters using HTML element attributes.
- Control with the keyboard.
- Ending and looped animation.
- Control the maximum size of a pop-up content.
- Progress counter.
- Ability to change the position of the information elements.
- The ability to hide unwanted information blocks.
- The ability to change the text direction of information blocks, up, down and to the right.
- Integration video from youtube.
- The ability to choose a ready theme (night, day, rainbow, chameleon and others)
- The ability to change content of text blocks
- Stylish modern design
- Beautiful and smooth animation effects
- Developer mode. Plugin displays hints in console.
License
All parts of this plugin: CSS and javascript codes are licensed according to the license purchased from Envato.
Read more about licensing here: http://codecanyon.net/licenses
Purchased Archive Structure
- Plugin styles file is in the "css" folder
- Plugin scripts file is in the "js" folder
Files Connection
1. The style file. Used for the decoration of all the elements of a plugin. View details
2. Javascript library jQuery View details
3. The main plugin file View details
<head> ...[THIS CODE]... </head>
<link rel="stylesheet" href="css/dexterbox.css">
<script src="js/jquery-1.11.1.min.js"></script>
<script src="js/jquery.dexterbox.js"></script>
HTML Structure
Add this HTML code with a unique data-name attribute to the code of site page.
<a href="doc_files/images/1.jpg"
	 class="dexterbox"
	 data-loop="false"
	 data-items-group="groupName"
	 data-items-title="imageTitle">
	 <img src="doc_files/images/1.jpg">
</a>
<a href="doc_files/images/2.jpg"
	 class="dexterbox"
	 data-items-group="groupName"
	 data-items-title="imageTitle">
	 <img src="doc_files/images/2.jpg">
</a>
Plugin Initialization
If you use an alternative method of HTML, the initialization is not necessary.
Plugin initialization is hidden and does not require the user of the call.
But there is "open" method, which opening lightbox with the specified options.
Usually this method is hooked to the "click" event
<script>
$(function(){
	$('.anyBtnClass').on('click',function(){

		/*Call with the default options*/
		dexterbox('open',{
			items:[{
				href:'doc_files/images/1.jpg',	//The path to a large copy image
				title:'Login'					//Title of image
			},{
				href:'https://www.youtube.com/watch?v=XDPwXQjAlB0',
				title:'Amsterdam 2016',
				youtube: {
					thumb_size:'maxresdefault',
					width:'50%',
					controls: 0
				}
			}],

			startIndex: 1,						//Image number from which to start viewing

			keyboard:{							//Control of keyboard buttons
			  left: true,
			  right: true,
			  esc: true
			},

			loop:true,							//looping Control

			max_width:'100vw',					//The maximum width of the content
			max_height:'75vh',					//The maximum height of the content

			counter_show:true,					//Control the display of progress counter
			counter_sep:'/',					//Separator of progress counter
			counter_pos:'top-left',				//Control the progress counter position

			title_side_show:true,				//Control display of side title
			title_side_pos:'bottom-left',		//Control the side title position

			title_back_show:true,				//Control display of back title

			close_text:'close',					//Control content of close button text
			close_text_show:true,				//Control display of close button text
			ui_text_direction:'top',			//Text direction of the information blocks [top (default), bottom, right]

			theme_name:'night',					//night (default), day, rainbow, chameleon

			developer_mode:false,				//If true -  plugin displays hints in console

			after_open: function(){},			//Fires after opening
			after_change: function(){},			//Fires after change
			after_close: function(){},			//Fires after close
			after_next: function(){},			//Fires after change to next
			after_prev: function(){}			//Fires after change to prev
		});
		return false;
	});
})
</script>
<a class="anyBtnClass" href="#">click to show lightbox</a>
CSS Structure
I'm using one CSS files dexterbox.css (css/dexterbox.css) in this plugin. It contains styles which are responsible for the correct plugin work.
JavaScript
To use the plugin you must import two files of javascript:
1. jQuery (js/jquery-X.X.X.min.js)
2. jquery.dexterbox.js (js/jquery.dexterbox.js)
1. jQuery is a Javascript library that greatly reduces the amount of code that you must write. If you imported this version of jQuery or any other, it is not necessary to import it for the second time
2. The main plugin code.
Quick Start
To add a plug-in to the site you need to walk a only 3 steps:
1. Include all the necessary files to the page of the site.
2. Place all necessary files on your server using ftp
3.1 Add HTML code
3.2 Or add Open Method
Full code of examples, see in "Usage"
API
Options
| Option | Default value | Datatype | Description |
|---|---|---|---|
| items | false | Boolean or Array | In this parameter, we send in plugin an image or video data , the path to them, title, and other additional parameres. It may take the values: false or Array See demo |
| items / href | - | String | Absolute or relative path path to a large copy image See demo |
| items / title | - | String | Title of image. Displayed in two places: on the side and rear of the image by performing background function See demo |
| items / youtube | - | Object | Links to Youtube videos will be embedded using the Youtube <iframe> API. It may take the values: object of youtube options Sets the player parameters of a Youtube video, available options can be found in the Youtube documentation: YouTube Embedded Players and Player Parameters. See demo |
| items / youtube / thumb_size | 'mqdefault' | String | Thumnail resolution can be set using the thumb_size parameter It may take the values: 'hqdefault' (480x360), 'mqdefault' (320x180), 'maxresdefault' (1280x720), 1 or 2 or 3 (120x90) See demo |
| items / youtube / width | 'auto' | String | This option only truly affects youtube content, for everything else this option will translate to maxWidth. It may take the values: any integer (px), 'any integer' (px), 'any integer %' (percent relative to window width), 'any integer vw' (percent relative to window width) See demo |
| startIndex | 1 | Number | Image number from which to start viewing It may take the values: any positive number |
| keyboard |
|
Object | Enable or disable individual keyboard buttons or all of them when set to false. Useful for when the content requires keyboard interaction. See demo |
| loop | true | Boolean | When set to true a group becomes a continuous loop, keeping navigation buttons enabled at all times. It may take the values: true or false See demo |
| max_width | '100vw' | String | Sets a maximum width for the content. It may take the values: Any positive number (px), 'Any positive number' (px), 'Any positive number %' (percent to window width), 'Any positive number vw' (percent to window width) See demo |
| max_height | '75vh' | String | Sets a maximum height for the content. It may take the values: Any positive number (px), 'Any positive number' (px), 'Any positive number %' (percent to window height), 'Any positive number vh' (percent to window height) See demo |
| counter_show | true | Boolean | Control the display of progress counter It may take the values: false or true See demo |
| counter_sep | '/' | String | Separator of progress counter It may take the values: Any string value See demo |
| counter_pos | 'top-left' | String | Control a progress counter position It may take the values: 'top-left', 'bottom-right', 'bottom-left' See demo |
| title_side_show | true | Boolean | Control display of side title It may take the values: false or true See demo |
| title_side_pos | 'bottom-left' | String | Specifies the corner in which the title will be located. It may take the values: 'top-left', 'bottom-right', 'bottom-left' See demo |
| title_back_show | true | Boolean | Shows a title when set to true, or hides it when set to false. It may take the values: false or true See demo |
| close_text | 'close' | String | Specifies the name of a closing button. It may take the values: Any string value See demo |
| close_text_show | true | Boolean | Shows a text when set to true, or hides it when set to false. It may take the values: false or true See demo |
| ui_text_direction | 'close' | String | Text direction of the information blocks It may take the values: 'top', 'bottom', 'right' See demo |
| theme_name | 'night' | String | Theme name of lightbox It may take the values: 'night', 'day', 'rainbow', 'chameleon' See demo |
| developer_mode | false | Boolean | If true - plugin displays all error and hints in console It may take the values: false or true |
Methods
open(options) |
Opens the modal
|
close() |
Closes the modal This method does not accept any arguments |
Events
after_open(object) |
Fires after opening
|
after_change(objects) |
Fires after change
|
after_close(object) |
Fires after close
|
after_next(object) |
Fires after Next
|
after_prev(object) |
Fires after Prev
|
Usage
Single Item
A single item can be shown by giving dexterbox('open') an items parameter with value as array of object with href sub-parameter:
1. JS API Method:
Show Image2. Alternative HTML approach (click to image):

3. Third Method
Source
<script src="http://code.jquery.com/jquery-latest.js"></script>
<link rel="stylesheet" href="css/dexterbox.css">
<script src="js/jquery.dexterbox.js"></script>
<!-- JS API Method -->
<script>
$(function(){
$('.singleItemBtn').on('click',function(){
dexterbox('open',{
items:[{
href:'doc_files/images/1.jpg'
}]
});
return false;
});
})
</script>
<a class="singleItemBtn" href="#">Show Image</a>
<!-- Alternative HTML approach -->
<a class="dexterbox" href="doc_files/images/1.jpg"><img src="doc_files/images/1.jpg"></a>
<!-- Third Method -->
<span class="dexterbox" data-items-href="doc_files/images/1.jpg"><img src="doc_files/images/1.jpg"></span>
Single Item with Title
Add a title by using a title sub-parameter or data-items-title attribute:
1. JS API Method:
Show Image with title2. Alternative HTML approach (click to image):
Source
<script src="http://code.jquery.com/jquery-latest.js"></script>
<link rel="stylesheet" href="css/dexterbox.css">
<script src="js/jquery.dexterbox.js"></script>
<!-- JS API Method -->
<script>
$(function(){
$('.singleTitleBtn').on('click',function(){
dexterbox('open',{
items:[{
href:'doc_files/images/1.jpg',
title:'My Title'
}]
});
return false;
});
})
</script>
<a class="singleTitleBtn" href="#">Show Image with title</a>
<!-- Alternative HTML approach -->
<a data-items-title="My Title" class="dexterbox" href="doc_files/images/1.jpg"><img src="doc_files/images/1.jpg"></a>
Group
Groups can be shown by giving dexterbox('open') an array with multiple items:
1. JS API Method:
Show Group2. Alternative HTML approach (click to image):
Source
<script src="http://code.jquery.com/jquery-latest.js"></script>
<link rel="stylesheet" href="css/dexterbox.css">
<script src="js/jquery.dexterbox.js"></script>
<!-- JS API Method -->
<script>
$(function(){
$('.showGroupBtn').on('click',function(){
dexterbox('open', {
items:[{
href:'doc_files/images/1.jpg',
title:'Login'
},{
href:'doc_files/images/2.jpg',
title:'Signup'
}]
});
return false;
});
})
</script>
<a class="showGroupBtn" href="#">Show Group</a>
<!-- Alternative HTML approach -->
<a data-items-title="Login" data-items-group="groupName" class="dexterbox" href="doc_files/images/1.jpg"><img src="doc_files/images/1.jpg"></a>
<a data-items-title="Signup" data-items-group="groupName" class="dexterbox" href="doc_files/images/2.jpg"><img src="doc_files/images/2.jpg"></a>
Links
Links that use the dexterbox class can also be opened by passing items parameter an element (jQuery object):
Show Link
Source
<script src="http://code.jquery.com/jquery-latest.js"></script>
<link rel="stylesheet" href="css/dexterbox.css">
<script src="js/jquery.dexterbox.js"></script>
<script>
$(function(){
$('.linksBtn').on('click',function(){
dexterbox('open',{
items:$('#anyLink').eq(0)
});
return false;
});
})
</script>
<a
id="anyLink"
data-items-title="Show Link"
class="dexterbox"
href="doc_files/images/1.jpg">
<img align="left" style="width:200px; margin-right:30px;" src="doc_files/images/1.jpg">
</a>
<a class="linksBtn" href="#">Show Link</a>
Callbacks
after_open
A function to call when dexterbox opened
The variable that is passed to the function contains an opened element object.
object.href //opened element path
object.title //opened element title
1. JS API Method
Show Callback "after_open"2. Alternative HTML approach (click to image)
Source
<script src="http://code.jquery.com/jquery-latest.js"></script>
<link rel="stylesheet" href="css/dexterbox.css">
<script src="js/jquery.dexterbox.js"></script>
<!-- JS API Method -->
<script>
$(function(){
$('.after_openBtn').on('click',function(){
dexterbox('open',{
items:[{
href:'doc_files/images/1.jpg',
title:'Login'
}],
after_open:function(object){
alert('JS Opened: '+object.href);
}
});
return false;
});
})
</script>
<a class="after_openBtn" href="#">Show Callback "after_open"</a>
<!-- Alternative HTML approach -->
<a href="doc_files/images/1.jpg"
class="dexterbox"
data-after_open="function(object){alert('HTML Opened: '+object.href);}"
data-items-title="Login">
<img src="doc_files/images/1.jpg">
</a>
after_change
A function to call when dexterbox changed
The variable that is passed to the function contains old element objects[0] and new element objects[1]
objects[0].href //old element path
objects[0].title //old element title
objects[1].href //new element path
objects[1].title //new element title
1. JS API Method
Show Callback "after_change"2. Alternative HTML approach (click to image)
To call function, you can use an attribute "data-after_change". Suffice it to point it at the first element of the group
Source
<script src="http://code.jquery.com/jquery-latest.js"></script>
<link rel="stylesheet" href="css/dexterbox.css">
<script src="js/jquery.dexterbox.js"></script>
<!-- JS API Method-->
<script>
$(function(){
$('.after_changeBtn').on('click',function(){
dexterbox('open',{
items:[{
href:'doc_files/images/1.jpg',
title:'Login'
},{
href:'doc_files/images/2.jpg',
title:'Signup'
}],
after_change:function(objects){
alert('JS Changed '+objects[0].href+' to '+objects[1].href);
}
});
return false;
});
})
</script>
<a class="after_changeBtn" href="#">Show Callback "after_change"</a>
<!-- Alternative HTML approach -->
<a href="doc_files/images/1.jpg"
class="dexterbox"
data-after_change="function(objects){alert('HTML Changed '+objects[0].href+' to '+objects[1].href)}"
data-items-group="changeGroupName"
data-items-title="Login">
<img src="doc_files/images/1.jpg">
</a>
<a href="doc_files/images/2.jpg"
class="dexterbox"
data-items-group="changeGroupName"
data-items-title="Signup">
<img src="doc_files/images/2.jpg">
</a>
after_next
A function to call when dexterbox changed using Next
object.href //new element path
object.title //new element title
1. JS API Method
Show Callback "after_next"2. Alternative HTML approach (click to image)
To call function, you can use an attribute "data-after_next". Suffice it to point it at the first element of the group
Source
<script src="http://code.jquery.com/jquery-latest.js"></script>
<link rel="stylesheet" href="css/dexterbox.css">
<script src="js/jquery.dexterbox.js"></script>
<!-- JS API Method-->
<script>
$(function(){
$('.after_nextBtn').on('click',function(){
dexterbox('open',{
items:[{
href:'doc_files/images/1.jpg',
title:'Login'
},{
href:'doc_files/images/2.jpg',
title:'Signup'
}],
after_next:function(object){
alert('JS Show next '+object.href);
}
});
return false;
});
})
</script>
<a class="after_nextBtn" href="#">Show Callback "after_next"</a>
<!-- Alternative HTML approach -->
<a href="doc_files/images/1.jpg"
class="dexterbox"
data-after_next="function(object){alert('HTML Show next '+object.href);}"
data-items-group="nextGroupName"
data-items-title="Login">
<img src="doc_files/images/1.jpg">
</a>
<a href="doc_files/images/2.jpg"
class="dexterbox"
data-items-group="nextGroupName"
data-items-title="Signup">
<img src="doc_files/images/2.jpg">
</a>
after_prev
A function to call when dexterbox changed using Prev
object.href //new element path
object.title //new element title
1. JS API Method
Show Callback "after_prev"2. Alternative HTML approach (click to image)
To call function, you can use an attribute "data-after_prev". Suffice it to point it at the first element of the group
Source
<script src="http://code.jquery.com/jquery-latest.js"></script>
<link rel="stylesheet" href="css/dexterbox.css">
<script src="js/jquery.dexterbox.js"></script>
<!-- JS API Method-->
<script>
$(function(){
$('.after_prevBtn').on('click',function(){
dexterbox('open',{
items:[{
href:'doc_files/images/1.jpg',
title:'Login'
},{
href:'doc_files/images/2.jpg',
title:'Signup'
}],
after_prev:function(object){
alert('JS Show prev '+object.href);
}
});
return false;
});
})
</script>
<a class="after_prevBtn" href="#">Show Callback "after_prev"</a>
<!-- Alternative HTML approach -->
<a href="doc_files/images/1.jpg"
class="dexterbox"
data-after_prev="function(object){alert('HTML Show prev '+object.href);}"
data-items-group="prevGroupName"
data-items-title="Login">
<img src="doc_files/images/1.jpg">
</a>
<a href="doc_files/images/2.jpg"
class="dexterbox"
data-items-group="prevGroupName"
data-items-title="Signup">
<img src="doc_files/images/2.jpg">
</a>
after_close
A function to call when dexterbox closed
object.href //new element path
object.title //new element title
1. JS API Method
Show Callback "after_close"2. Alternative HTML approach (click to image)
To call function, you can use an attribute "data-after_close".
Source
<script src="http://code.jquery.com/jquery-latest.js"></script>
<link rel="stylesheet" href="css/dexterbox.css">
<script src="js/jquery.dexterbox.js"></script>
<!-- JS API Method -->
<script>
$(function(){
$('.after_closeBtn').on('click',function(){
dexterbox('open',{
items:[{
href:'doc_files/images/1.jpg',
title:'Login'
}],
after_close:function(object){
alert('JS Closed: '+object.href);
}
});
return false;
});
})
</script>
<a class="after_closeBtn" href="#">Show Callback "after_close"</a>
<!-- Alternative HTML approach -->
<a href="doc_files/images/1.jpg"
class="dexterbox"
data-after_close="function(object){alert('HTML Closed: '+object.href);}"
data-items-title="Login">
<img src="doc_files/images/1.jpg">
</a>
Options
keyboard
Enable or disable individual keyboard buttons or all of them when set to false. Useful for when the content requires keyboard interaction.
1. JS API Method
Use an object to toggle different buttons.
//default
keyboard: {
  left: true,
  right: true,
  esc: true
}
keyboard: false
2. Alternative HTML approach (click to image)
To set parameter, you can use an attribute "data-keyboard".
Source
<script src="http://code.jquery.com/jquery-latest.js"></script>
<link rel="stylesheet" href="css/dexterbox.css">
<script src="js/jquery.dexterbox.js"></script>

<!--JS API Method-->
<script>
$(function(){
	$('.keyboardBtn').on('click',function(){
		dexterbox('open',{
			items:[{
				href:'doc_files/images/1.jpg',
				title:'Login'
			},{
				href:'doc_files/images/2.jpg',
				title:'Signup'
			}],
			keyboard: false
		});
		return false;
	});
})
</script>
<a class="keyboardBtn" href="#">Example with disabled keyboard</a>

<!--Alternative HTML approach-->
<a href="doc_files/images/1.jpg"
	 class="dexterbox"
	 data-keyboard="false"
	 data-items-group="keyboardGroupName"
	 data-items-title="Login">
	 <img src="doc_files/images/1.jpg">
</a>
<a href="doc_files/images/2.jpg"
	 class="dexterbox"
	 data-keyboard="false"
	 data-items-group="keyboardGroupName"
	 data-items-title="Signup">
	 <img src="doc_files/images/2.jpg">
</a>
loop
When set to true a group becomes a continuous loop, keeping navigation buttons enabled at all times.
1. JS API Method
loop: false
loop: true //default
2. Alternative HTML approach (click to image)
To set parameter, you can use an attribute "data-loop".
Source
<script src="http://code.jquery.com/jquery-latest.js"></script>
<link rel="stylesheet" href="css/dexterbox.css">
<script src="js/jquery.dexterbox.js"></script>

<!--JS API Method-->
<script>
$(function(){
	$('.loopBtn').on('click',function(){
		dexterbox('open',{
			items:[{
				href:'doc_files/images/1.jpg',
				title:'Login'
			},{
				href:'doc_files/images/2.jpg',
				title:'Signup'
			}],
			loop: false
		});
		return false;
	});
})
</script>
<a class="loopBtn" href="#">Example without looping</a>

<!--Alternative HTML approach-->
<a href="doc_files/images/1.jpg"
	 class="dexterbox"
	 data-loop="false"
	 data-items-group="loopGroupName"
	 data-items-title="Login">
	 <img src="doc_files/images/1.jpg">
</a>
<a href="doc_files/images/2.jpg"
	 class="dexterbox"
	 data-loop="false"
	 data-items-group="loopGroupName"
	 data-items-title="Signup">
	 <img src="doc_files/images/2.jpg">
</a>
max_height
Sets a maximum height for the content.
1. JS API Method
max_height: '75%'
max_height: '75vh'  //default
max_height: '300px'
max_height: 300
2. Alternative HTML approach (click to image)
Source
<script src="http://code.jquery.com/jquery-latest.js"></script>
<link rel="stylesheet" href="css/dexterbox.css">
<script src="js/jquery.dexterbox.js"></script>

<!-- JS API Method-->
<script>
$(function(){
	$('.max_heightBtn').on('click',function(){
		dexterbox('open',{
			items:[{
				href:'doc_files/images/1.jpg',
				title:'Login'
			}],
			max_height: '100%'
		});
		return false;
	});
})
</script>
<a class="max_heightBtn" href="#">Example with a custom limiting height</a>

<!-- Alternative HTML approach-->
<a href="doc_files/images/1.jpg"
	class="dexterbox"
	data-max_height="100%"
	data-items-title="Login">
	<img src="doc_files/images/1.jpg">
</a>
max_width
Sets a maximum width for the content.
1. JS API Method
max_width: '100%'
max_width: '100vw' //default
max_width: '200px'
max_width: 200
2. Alternative HTML approach (click to image)
Source
<script src="http://code.jquery.com/jquery-latest.js"></script>
<link rel="stylesheet" href="css/dexterbox.css">
<script src="js/jquery.dexterbox.js"></script>

<!-- JS API Method-->
<script>
$(function(){
	$('.max_widthBtn').on('click',function(){
		dexterbox('open',{
			items:[{
				href:'doc_files/images/1.jpg',
				title:'Login'
			}],
			max_width: '200px'
		});
		return false;
	});
})
</script>
<a class="max_widthBtn" href="#">Example with a custom limiting width</a>

<!-- Alternative HTML approach-->
<a href="doc_files/images/1.jpg"
	class="dexterbox"
	data-max_width="200px"
	data-items-title="Login">
	<img src="doc_files/images/1.jpg">
</a>
counter_show
Shows a position indicator when set to true, or hides it when set to false.
1. JS API Method
counter_show: true //default
counter_show: false
2. Alternative HTML approach (click to image)
Source
<script src="http://code.jquery.com/jquery-latest.js"></script>
<link rel="stylesheet" href="css/dexterbox.css">
<script src="js/jquery.dexterbox.js"></script>

<!-- JS API Method-->
<script>
$(function(){
	$('.counter_showBtn').on('click',function(){
		dexterbox('open',{
			items:[{
				href:'doc_files/images/1.jpg',
				title:'Login'
			}],
			counter_show: false
		});
		return false;
	});
})
</script>
<a class="counter_showBtn" href="#">Example with disabled counter</a>

<!-- Alternative HTML approach -->
<a href="doc_files/images/1.jpg"
	class="dexterbox"
	data-items-title="Login"
	data-counter_show="false">
	<img src="doc_files/images/1.jpg">
</a>
counter_sep
Specifies the separator.
1. JS API Method
counter_sep:'/' //default
Example with of custom separator element
2. Alternative HTML approach (click to image)
Source
<script src="http://code.jquery.com/jquery-latest.js"></script>
<link rel="stylesheet" href="css/dexterbox.css">
<script src="js/jquery.dexterbox.js"></script>

<!-- JS API Method -->
<script>
$(function(){
	$('.counter_sepBtn').on('click',function(){
		dexterbox('open',{
			items:[{
				href:'doc_files/images/1.jpg',
				title:'Login'
			},{
				href:'doc_files/images/2.jpg',
				title:'Signup'
			}],
			counter_sep:'.   .   .   . '
		});
		return false;
	});
})
</script>
<p><a class="counter_sepBtn" href="#">Example with of custom separator element</a></p>

<!-- Alternative HTML approach-->
<a href="doc_files/images/1.jpg"
	class="dexterbox"
	data-items-title="Login"
	data-items-group="sepGroupName"
	data-counter_sep=".   .   .   .">
	<img src="doc_files/images/1.jpg">
</a>
<a href="doc_files/images/2.jpg"
	class="dexterbox"
	data-items-group="sepGroupName"
	data-items-title="Signup">
	<img src="doc_files/images/2.jpg">
</a>
counter_pos
Specifies the corner in which the counter will be located.
1. JS API Method
counter_pos:'top-left' //default
counter_pos:'bottom-left'
counter_pos:'bottom-right'
2. Alternative HTML approach (click to image)
Source
<script src="http://code.jquery.com/jquery-latest.js"></script>
<link rel="stylesheet" href="css/dexterbox.css">
<script src="js/jquery.dexterbox.js"></script>

<!-- JS API Method-->
<script>
$(function(){
	$('.counter_posBtn').on('click',function(){
		dexterbox('open',{
			items:[{
				href:'doc_files/images/1.jpg',
				title:'Login'
			}],
			counter_pos:'bottom-right'
		});
		return false;
	});
})
</script>
<a class="counter_posBtn" href="#">Example with of custom counter position</a>

<!-- Alternative HTML approach-->
<a href="doc_files/images/1.jpg"
	class="dexterbox"
	data-items-title="Login"
	data-counter_pos="bottom-right">
	<img src="doc_files/images/1.jpg">
</a>
title_back_show
Shows a title when set to true, or hides it when set to false.
1. JS API Method
title_back_show:true //default
title_back_show:false
Example with disabled back title
2. Alternative HTML approach (click to image)
Source
<script src="http://code.jquery.com/jquery-latest.js"></script>
<link rel="stylesheet" href="css/dexterbox.css">
<script src="js/jquery.dexterbox.js"></script>

<!-- JS API Method-->
<script>
$(function(){
	$('.titleBackBtn').on('click',function(){
		dexterbox('open',{
			items:[{
				href:'doc_files/images/2.jpg',
				title:'Signup'
			}],
			title_back_show:false
		});
		return false;
	});
})
</script>
<p><a class="titleBackBtn" href="#">Example with disabled back title</a></p>

<!-- Alternative HTML approach-->
<a href="doc_files/images/2.jpg"
	class="dexterbox"
	data-items-title="Signup"
	data-title_back_show="false">
	<img src="doc_files/images/2.jpg">
</a>
title_side_show
Shows a title when set to true, or hides it when set to false.
1. JS API Method
title_side_show:true //default
title_side_show:false
2. Alternative HTML approach (click to image)
Source
<script src="http://code.jquery.com/jquery-latest.js"></script>
<link rel="stylesheet" href="css/dexterbox.css">
<script src="js/jquery.dexterbox.js"></script>

<!-- JS API Method-->
<script>
$(function(){
	$('.titleSideBtn').on('click',function(){
		dexterbox('open',{
			items:[{
				href:'doc_files/images/2.jpg',
				title:'Signup'
			}],
			title_side_show:false
		});
		return false;
	});
})
</script>
<a class="titleSideBtn" href="#">Example with disabled small title</a>

<!--Alternative HTML approach-->
<a href="doc_files/images/2.jpg"
	class="dexterbox"
	data-items-title="Signup"
	data-title_side_show="false">
	<img src="doc_files/images/2.jpg">
</a>
title_side_pos
Specifies the corner in which the title will be located.
1. JS API Method
title_side_pos:'bottom-left' //default
title_side_pos:'bottom-right'
title_side_pos:'top-left'
2. Alternative HTML approach (click to image)
Source
<script src="http://code.jquery.com/jquery-latest.js"></script>
<link rel="stylesheet" href="css/dexterbox.css">
<script src="js/jquery.dexterbox.js"></script>

<!-- JS API Method-->
<script>
$(function(){
	$('.title_side_posBtn').on('click',function(){
		dexterbox('open',{
			items:[{
				href:'doc_files/images/2.jpg',
				title:'Signup'
			}],
			title_side_pos:'bottom-right'
		});
		return false;
	});
})
</script>
<a class="title_side_posBtn" href="#">Example with of custom small title position</a>

<!--Alternative HTML approach-->
<a href="doc_files/images/2.jpg"
	class="dexterbox"
	data-items-title="Signup"
	data-title_side_pos="bottom-right">
	<img src="doc_files/images/2.jpg">
</a>
close_text
Specifies the name of a closing button.
1. JS API Method
close_text:'Close' //default
2. Alternative HTML approach (click to image)
Source
<script src="http://code.jquery.com/jquery-latest.js"></script>
<link rel="stylesheet" href="css/dexterbox.css">
<script src="js/jquery.dexterbox.js"></script>

<!-- JS API Method-->
<script>
$(function(){
	$('.close_textBtn').on('click',function(){
		dexterbox('open',{
			items:[{
				href:'doc_files/images/2.jpg',
				title:'Signup'
			}],
			close_text:'Schließen'
		});
		return false;
	});
})
</script>
<a class="close_textBtn" href="#">Example with of custom text of close button</a>

<!-- Alternative HTML approach-->
<a href="doc_files/images/2.jpg"
	class="dexterbox"
	data-items-title="Signup"
	data-close_text="Schließen">
	<img src="doc_files/images/2.jpg">
</a>
close_text_show
Shows a text when set to true, or hides it when set to false.
1. JS API Method
close_text_show:true //default
close_text_show:false
2. Alternative HTML approach
Source
<script src="http://code.jquery.com/jquery-latest.js"></script>
<link rel="stylesheet" href="css/dexterbox.css">
<script src="js/jquery.dexterbox.js"></script>

<!-- JS API Method-->
<script>
$(function(){
	$('.close_text_showBtn').on('click',function(){
		dexterbox('open',{
			items:[{
				href:'doc_files/images/2.jpg',
				title:'Signup'
			}],
			close_text_show:false
		});
		return false;
	});
})
</script>
<a class="close_text_showBtn" href="#">Example with disabled text of close button</a>

<!-- Alternative HTML approach-->
<a href="doc_files/images/2.jpg"
	class="dexterbox"
	data-items-title="Signup"
	data-close_text_show="false">
	<img src="doc_files/images/2.jpg">
</a>
ui_text_direction
Sets the text direction for UI elements.
1. JS API Method
ui_text_direction:'top' //default
ui_text_direction:'bottom'
ui_text_direction:'right'
2. Alternative HTML approach
Source
<script src="http://code.jquery.com/jquery-latest.js"></script>
<link rel="stylesheet" href="css/dexterbox.css">
<script src="js/jquery.dexterbox.js"></script>

<!-- JS API Method-->
<script>
$(function(){
	$('.directionDefaultBtn').on('click',function(){
		dexterbox('open',{
			items:[{
				href:'doc_files/images/1.jpg',
				title:'Login'
			},{
				href:'doc_files/images/2.jpg',
				title:'Signup'
			}]
		});
		return false;
	});
	$('.directionBottomBtn').on('click',function(){
		dexterbox('open',{
			items:[{
				href:'doc_files/images/1.jpg',
				title:'Login'
			},{
				href:'doc_files/images/2.jpg',
				title:'Signup'
			}],
			ui_text_direction:'bottom'
		});
		return false;
	});
	$('.directionRightBtn').on('click',function(){
		dexterbox('open',{
			items:[{
				href:'doc_files/images/1.jpg',
				title:'Login'
			},{
				href:'doc_files/images/2.jpg',
				title:'Signup'
			}],
			ui_text_direction:'right'
		});
		return false;
	});
})
</script>
<a class="directionDefaultBtn" href="#">"top" (default) direction</a>
<a class="directionBottomBtn" href="#">"bottom" direction</a>
<a class="directionRightBtn" href="#">"right" direction</a>

<!-- Alternative HTML approach-->
<a href="doc_files/images/1.jpg"
	class="dexterbox"
	data-items-title="Login"
	data-ui_text_direction="right">
	<img src="doc_files/images/1.jpg">
</a>
youtube
Links to Youtube videos will be embedded using the Youtube <iframe> API..
1. JS API Method
Example with Youtube video2. Alternative HTML approach (click to image)


Source
<script src="http://code.jquery.com/jquery-latest.js"></script>
<link rel="stylesheet" href="css/dexterbox.css">
<script src="js/jquery.dexterbox.js"></script>

<!-- JS API Method-->
<script>
$(function(){
	$('.youtubeBtn').on('click',function(){
		dexterbox('open',{
			items:[{
				href:'https://youtu.be/Y6kr5b7Qgk4',
				title:'New York City 2016'
			},{
				href:'https://www.youtube.com/watch?v=XDPwXQjAlB0',
				title:'Amsterdam 2016'
			}]
		});
		return false;
	});
})
</script>
<a class="youtubeBtn" href="#">Example with Youtube video</a>

<!-- Alternative HTML approach-->
<a href="https://youtu.be/Y6kr5b7Qgk4"
	class="dexterbox"
	data-items-title="New York City 2016"
	data-items-group="myVideoGroup">
	<img src="http://img.youtube.com/vi/Y6kr5b7Qgk4/mqdefault.jpg">
</a>
<a href="https://www.youtube.com/watch?v=XDPwXQjAlB0"
	class="dexterbox"
	data-items-title="Amsterdam 2016"
	data-items-group="myVideoGroup">
	<img src="http://img.youtube.com/vi/XDPwXQjAlB0/mqdefault.jpg">
</a>
items / youtube / thumb_size
For Youtube <iframe> can be set options using the youtube option for "items" parameter
Thumnail resolution can be set using the thumb_size parameter
1. JS API Method
youtube: {
	thumb_size:'hqdefault'
}
thumb_size: 'hqdefault' //(default - 480x360)
thumb_size: 'mqdefault' //(320x180)
thumb_size: 'maxresdefault' //(1280x720)
thumb_size: 1 //(or 2 or 3 - 120x90)
2. Alternative HTML approach (click to image)
Source
<script src="http://code.jquery.com/jquery-latest.js"></script>
<link rel="stylesheet" href="css/dexterbox.css">
<script src="js/jquery.dexterbox.js"></script>

<!-- JS API Method-->
<script>
$(function(){
	$('.youtubeThumbBtn').on('click',function(){
		dexterbox('open',{
			items:[{
				href:'https://youtu.be/Y6kr5b7Qgk4',
				title:'New York City 2016',
				youtube: {
					thumb_size:'mqdefault'	//hqdefault (480x360)[default], mqdefault (320x180), maxresdefault (1280x720) , 1 or 2 or 3 (120x90)
				}
			},{
				href:'https://www.youtube.com/watch?v=XDPwXQjAlB0',
				title:'Amsterdam 2016',
				youtube: {
					thumb_size:'maxresdefault'	//hqdefault (480x360)[default], mqdefault (320x180), maxresdefault (1280x720) , 1 or 2 or 3 (120x90)
				}
			}]

		});
		return false;
	});
})
</script>
<a class="youtubeThumbBtn" href="#">Youtube video with custom thumbnails size</a>

<!-- Alternative HTML approach-->
<a href="https://youtu.be/Y6kr5b7Qgk4"
	 class="dexterbox"
	 data-items-title="New York City 2016"
	 data-items-youtube="{'thumb_size':'mqdefault'}"
	 data-items-group="myVideoGroup2">
	<img src="http://img.youtube.com/vi/Y6kr5b7Qgk4/mqdefault.jpg">
</a>
<a href="https://www.youtube.com/watch?v=XDPwXQjAlB0"
	class="dexterbox"
	data-items-title="Amsterdam 2016"
	data-items-youtube="{'thumb_size':'maxresdefault'}"
	data-items-group="myVideoGroup2">
	<img src="http://img.youtube.com/vi/XDPwXQjAlB0/mqdefault.jpg">
</a>
items / youtube / width
This option only truly affects youtube content, for everything else this option will translate to maxWidth.
1. JS API Method
youtube: {
	width: 1280
}
width: 1280
width: '1280'
width: '50%'
width: '50vw'
2. Alternative HTML approach (click to image)
Source
<script src="http://code.jquery.com/jquery-latest.js"></script>
<link rel="stylesheet" href="css/dexterbox.css">
<script src="js/jquery.dexterbox.js"></script>

<!-- JS API Method-->
<script>
$(function(){
	$('.youtubeWidthBtn').on('click',function(){
		dexterbox('open',{
			items:[{
				href:'https://youtu.be/Y6kr5b7Qgk4',
				title:'New York City 2016',
				youtube: {
					width:'1280'
				}
			},{
				href:'https://www.youtube.com/watch?v=XDPwXQjAlB0',
				title:'Amsterdam 2016',
				youtube: {
					width:'50%'
				}
			}]

		});
		return false;
	});
})
</script>
<a class="youtubeWidthBtn" href="#">Youtube video with custom width</a>

<!-- Alternative HTML approach-->
<a href="https://youtu.be/Y6kr5b7Qgk4"
	 class="dexterbox"
	 data-items-title="New York City 2016"
	 data-items-youtube="{'width':'1280'}"
	 data-items-group="myVideoGroup4">
	<img src="http://img.youtube.com/vi/Y6kr5b7Qgk4/mqdefault.jpg">
</a>
<a href="https://www.youtube.com/watch?v=XDPwXQjAlB0"
	class="dexterbox"
	data-items-title="Amsterdam 2016"
	data-items-youtube="{'width':'50%'}"
	data-items-group="myVideoGroup4">
	<img src="http://img.youtube.com/vi/XDPwXQjAlB0/mqdefault.jpg">
</a>
items / youtube / thumb_size
Sets the player parameters of a Youtube video, available options can be found in the Youtube documentation: YouTube Embedded Players and Player Parameters.
1. JS API Method
youtube: {
  autohide: 1,
  controls: 1,
  modestbranding: 1,
  rel: 0
}
2. Alternative HTML approach (click to image)
Source
<script src="http://code.jquery.com/jquery-latest.js"></script>
<link rel="stylesheet" href="css/dexterbox.css">
<script src="js/jquery.dexterbox.js"></script>

<!-- JS API Method-->
<script>
$(function(){
	$('.youtubeOptBtn').on('click',function(){
		dexterbox('open',{
			items:[{
				href:'https://youtu.be/Y6kr5b7Qgk4',
				title:'New York City 2016',
				youtube: {
					controls: 0
				}
			},{
				href:'https://www.youtube.com/watch?v=XDPwXQjAlB0',
				title:'Amsterdam 2016',
				youtube: {
					rel: 0
				}
			}]

		});
		return false;
	});
})
</script>
<a class="youtubeOptBtn" href="#">Youtube video with custom thumbnails size</a>

<!-- Alternative HTML approach-->
<a href="https://youtu.be/Y6kr5b7Qgk4"
	 class="dexterbox"
	 data-items-title="New York City 2016"
	 data-items-youtube="{'controls':'0'}"
	 data-items-group="myVideoGroup3">
	<img src="http://img.youtube.com/vi/Y6kr5b7Qgk4/mqdefault.jpg">
</a>
<a href="https://www.youtube.com/watch?v=XDPwXQjAlB0"
	class="dexterbox"
	data-items-title="Amsterdam 2016"
	data-items-youtube="{'rel':'0'}"
	data-items-group="myVideoGroup3">
	<img src="http://img.youtube.com/vi/XDPwXQjAlB0/mqdefault.jpg">
</a>
theme_name
In a plugin there are 2 pre-installed themes
1. JS API Method
theme_name:'night' //default
theme_name:'day'
theme_name:'rainbow'  //With each new call the background color will be different
theme_name:'chameleon'  //With each new call the background color will be different
2. Alternative HTML approach
Source
<script src="http://code.jquery.com/jquery-latest.js"></script>
<link rel="stylesheet" href="css/dexterbox.css">
<script src="js/jquery.dexterbox.js"></script>

<!-- JS API Method-->
<script>
$(function(){
	$('.themeDayBtn').on('click',function(){
		dexterbox('open',{
			items:[{
				href:'doc_files/images/1.jpg',
				title:'Login'
			},{
				href:'doc_files/images/2.jpg',
				title:'Signup'
			}],
			theme_name:'day'
		});
		return false;
	});
})
</script>
<a class="themeDayBtn" href="#">View example with "day" theme</a>

<!-- Alternative HTML approach-->
<a href="doc_files/images/1.jpg"
	class="dexterbox"
	data-items-title="Login"
	data-items-group="theme_1"
	data-theme_name="day">
	<img src="doc_files/images/1.jpg">
</a>
<a href="doc_files/images/2.jpg"
	class="dexterbox"
	data-items-title="Signup"
	data-items-group="theme_1">
	<img src="doc_files/images/2.jpg">
</a>
Methods
Source
<script src="http://code.jquery.com/jquery-latest.js"></script>
<link rel="stylesheet" href="css/dexterbox.css">
<script src="js/jquery.dexterbox.js"></script>
<script>
$(function(){
	$('.hideBtn').on('click',function(){
		dexterbox('open',{
			items:[{
				href:'doc_files/images/1.jpg',
				title:'Close'
			}]
		});

		setTimeout(function(){
			dexterbox('close');
		},3000)
		return false;
	});
})
</script>
<a class="hideBtn" href="#">Show and then hide after 3 seconds</a>
Themes
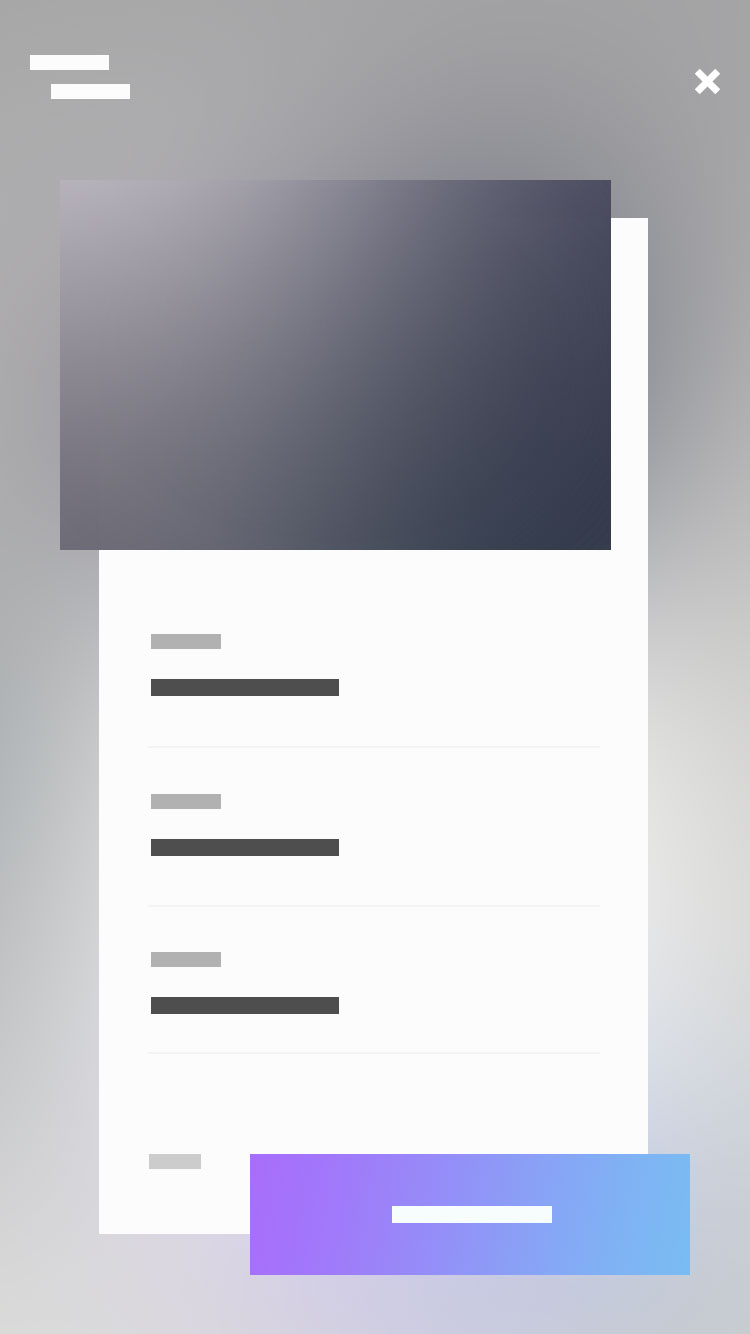
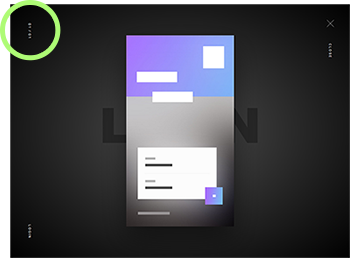
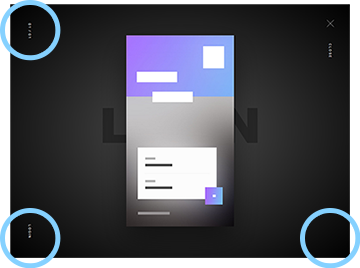
night
Dark theme default
1. JS API Method
View example with "night" theme2. Alternative HTML approach
Source
<script src="http://code.jquery.com/jquery-latest.js"></script>
<link rel="stylesheet" href="css/dexterbox.css">
<script src="js/jquery.dexterbox.js"></script>

<!-- JS API Method-->
<script>
$(function(){
	$('.themeNightBtn').on('click',function(){
		dexterbox('open',{
			items:[{
				href:'doc_files/images/1.jpg',
				title:'Login'
			},{
				href:'doc_files/images/2.jpg',
				title:'Signup'
			}]
		});
		return false;
	});
})
</script>
<a class="themeNightBtn" href="#">View example with "night" theme</a>

<!-- Alternative HTML approach-->
<a href="doc_files/images/1.jpg"
	class="dexterbox"
	data-items-title="Login"
	data-items-group="gr_th_n">
	<img src="doc_files/images/1.jpg">
</a>
<a href="doc_files/images/2.jpg"
	class="dexterbox"
	data-items-title="Signup"
	data-items-group="gr_th_n">
	<img src="doc_files/images/2.jpg">
</a>
Source
<script src="http://code.jquery.com/jquery-latest.js"></script>
<link rel="stylesheet" href="css/dexterbox.css">
<script src="js/jquery.dexterbox.js"></script>

<!-- JS API Method-->
<script>
$(function(){
	$('.themeDayBtn').on('click',function(){
		dexterbox('open',{
			theme_name:'day',
			items:[{
				href:'doc_files/images/1.jpg',
				title:'Login'
			},{
				href:'doc_files/images/2.jpg',
				title:'Signup'
			}]
		});
		return false;
	});
})
</script>
<a class="themeDayBtn" href="#">View example with "day" theme</a>

<!-- Alternative HTML approach-->
<a href="doc_files/images/1.jpg"
	class="dexterbox"
	data-theme_name="day"
	data-items-title="Login"
	data-items-group="gr_th_d">
	<img src="doc_files/images/1.jpg">
</a>
<a href="doc_files/images/2.jpg"
	class="dexterbox"
	data-items-title="Signup"
	data-items-group="gr_th_d">
	<img src="doc_files/images/2.jpg">
</a>
rainbow
Generated random gradient before opening
1. JS API Method
View example with "rainbow" theme2. Alternative HTML approach
Source
<script src="http://code.jquery.com/jquery-latest.js"></script>
<link rel="stylesheet" href="css/dexterbox.css">
<script src="js/jquery.dexterbox.js"></script>

<!-- JS API Method-->
<script>
$(function(){
	$('.themeRainbowBtn').on('click',function(){
		dexterbox('open',{
			theme_name:'rainbow',
			items:[{
				href:'doc_files/images/1.jpg',
				title:'Login'
			},{
				href:'doc_files/images/2.jpg',
				title:'Signup'
			}]
		});
		return false;
	});
})
</script>
<a class="themeRainbowBtn" href="#">View example with "rainbow" theme</a>


<!-- Alternative HTML approach-->
<a href="doc_files/images/1.jpg"
	class="dexterbox"
	data-theme_name="rainbow"
	data-items-title="Login"
	data-items-group="gr_th_r">
	<img src="doc_files/images/1.jpg">
</a>
<a href="doc_files/images/2.jpg"
	class="dexterbox"
	data-items-title="Signup"
	data-items-group="gr_th_r">
	<img src="doc_files/images/2.jpg">
</a>
chameleon
Generated random color before change
1. JS API Method
View example with "chameleon" theme2. Alternative HTML approach
Source
<script src="http://code.jquery.com/jquery-latest.js"></script>
<link rel="stylesheet" href="css/dexterbox.css">
<script src="js/jquery.dexterbox.js"></script>

<!-- JS API Method-->
<script>
$(function(){
	$('.themeChameleonBtn').on('click',function(){
		dexterbox('open',{
			theme_name:'chameleon',
			items:[{
				href:'doc_files/images/1.jpg',
				title:'Login'
			},{
				href:'doc_files/images/2.jpg',
				title:'Signup'
			}]
		});
		return false;
	});
})
</script>
<a class="themeChameleonBtn" href="#">View example with "chameleon" theme</a>


<!-- Alternative HTML approach-->
<a href="doc_files/images/1.jpg"
	class="dexterbox"
	data-theme_name="chameleon"
	data-items-title="Login"
	data-items-group="gr_th_r">
	<img src="doc_files/images/1.jpg">
</a>
<a href="doc_files/images/2.jpg"
	class="dexterbox"
	data-items-title="Signup"
	data-items-group="gr_th_r">
	<img src="doc_files/images/2.jpg">
</a>
Custom Styles
The design can be changed with just a few rules
violet style
Source
<script src="http://code.jquery.com/jquery-latest.js"></script>
<link rel="stylesheet" href="css/dexterbox.css">
<script src="js/jquery.dexterbox.js"></script>

<style>
[data-theme=db-theme-violet].db-overlay--design {
	background:#A875FE;
	background: radial-gradient(ellipse at center,  #80B2F7 0%,#A875FE 100%);
	filter: progid:DXImageTransform.Microsoft.gradient( startColorstr='#80B2F7', endColorstr='#A875FE',GradientType=1 ); /* IE6-9 fallback on horizontal gradient */
}
[data-theme=db-theme-violet] .db-modal-close--text,
[data-theme=db-theme-violet] .db-modal-title--side,
[data-theme=db-theme-violet] .db-count-active,
[data-theme=db-theme-violet] .db-count-length,
[data-theme=db-theme-violet] .db-nav__icon {
	color:#fff;
}
[data-theme=db-theme-violet] .db-modal-close--icon:before,
[data-theme=db-theme-violet] .db-modal-close--icon:after {
	background-color:#fff;
}
[data-theme=db-theme-violet] .db-modal-title--back {
	color:rgba(0,0,0,0.1);
}
</style>
<a href="doc_files/images/1.jpg"
	class="dexterbox"
	data-items-title="Login"
	data-items-group="violet_style"
	data-theme_name="db-theme-violet">
	<img src="doc_files/images/1.jpg">
</a>
<a href="doc_files/images/2.jpg"
	class="dexterbox"
	data-items-title="Signup"
	data-items-group="violet_style">
	<img src="doc_files/images/2.jpg">
</a>